A mood board is a visual tool that helps convey ideas, inspire creativity, and set the tone for a project. Whether you’re designing a room, planning an event, or developing a brand, mood boards are invaluable in organizing and visualizing concepts. This article delves into the essentials of creating an effective mood board, exploring tools, tips, and step-by-step processes to ensure your vision comes to life.
Mood boards can take many forms, from digital designs to physical collages. They often include colors, textures, images, and typography that resonate with a specific theme or sentiment. Here’s a closer look at how you can create one tailored to your project.
Step 1: Define Your Purpose
Before starting your mood board, it’s crucial to define your purpose. Are you creating a mood board for a personal project, a business presentation, or a collaborative design? Understanding your objective will guide your selections and help maintain focus. For instance, if it’s for a wedding, you’ll focus on colors, styles, and images that evoke the desired ambiance for the day.
Step 2: Gather Inspiration
Once you’ve defined your purpose, gather inspiration. This can come from various sources such as magazines, books, Pinterest, or social media platforms. Take your time to explore different ideas and concepts—don’t restrict yourself at this stage. The goal is to gather a wide array of visuals that encapsulate your theme.
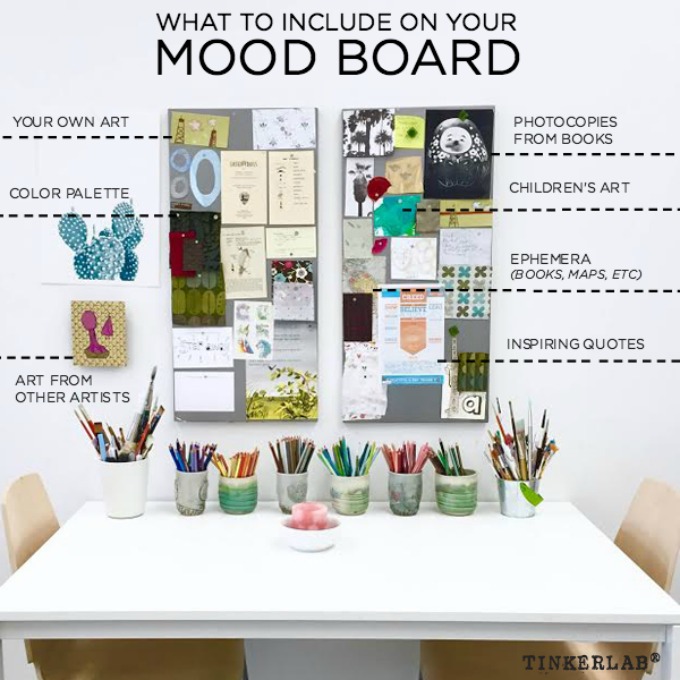
An example of a well-crafted mood board.
Source: TinkerLab
Step 3: Choose Your Medium
Mood boards can be physical or digital. Physical mood boards can use corkboards, poster boards, or even canvases to arrange your images and materials. For digital mood boards, various applications such as Canva, Milanote, or Adobe Creative Cloud facilitate the arrangement of images and layouts. The choice of medium depends on your preference and the level of detail you want to achieve.
Step 4: Organize the Elements
Once you’ve gathered your inspirations, it’s time to organize them on your board. Start arranging your visuals into categories such as color palettes, textures, and images that reflect your core message. Creating a harmonious layout is essential; balance the colors and textures to achieve the desired visual flow. Tools like Canva come equipped with templates to make this process easier and more visually appealing.

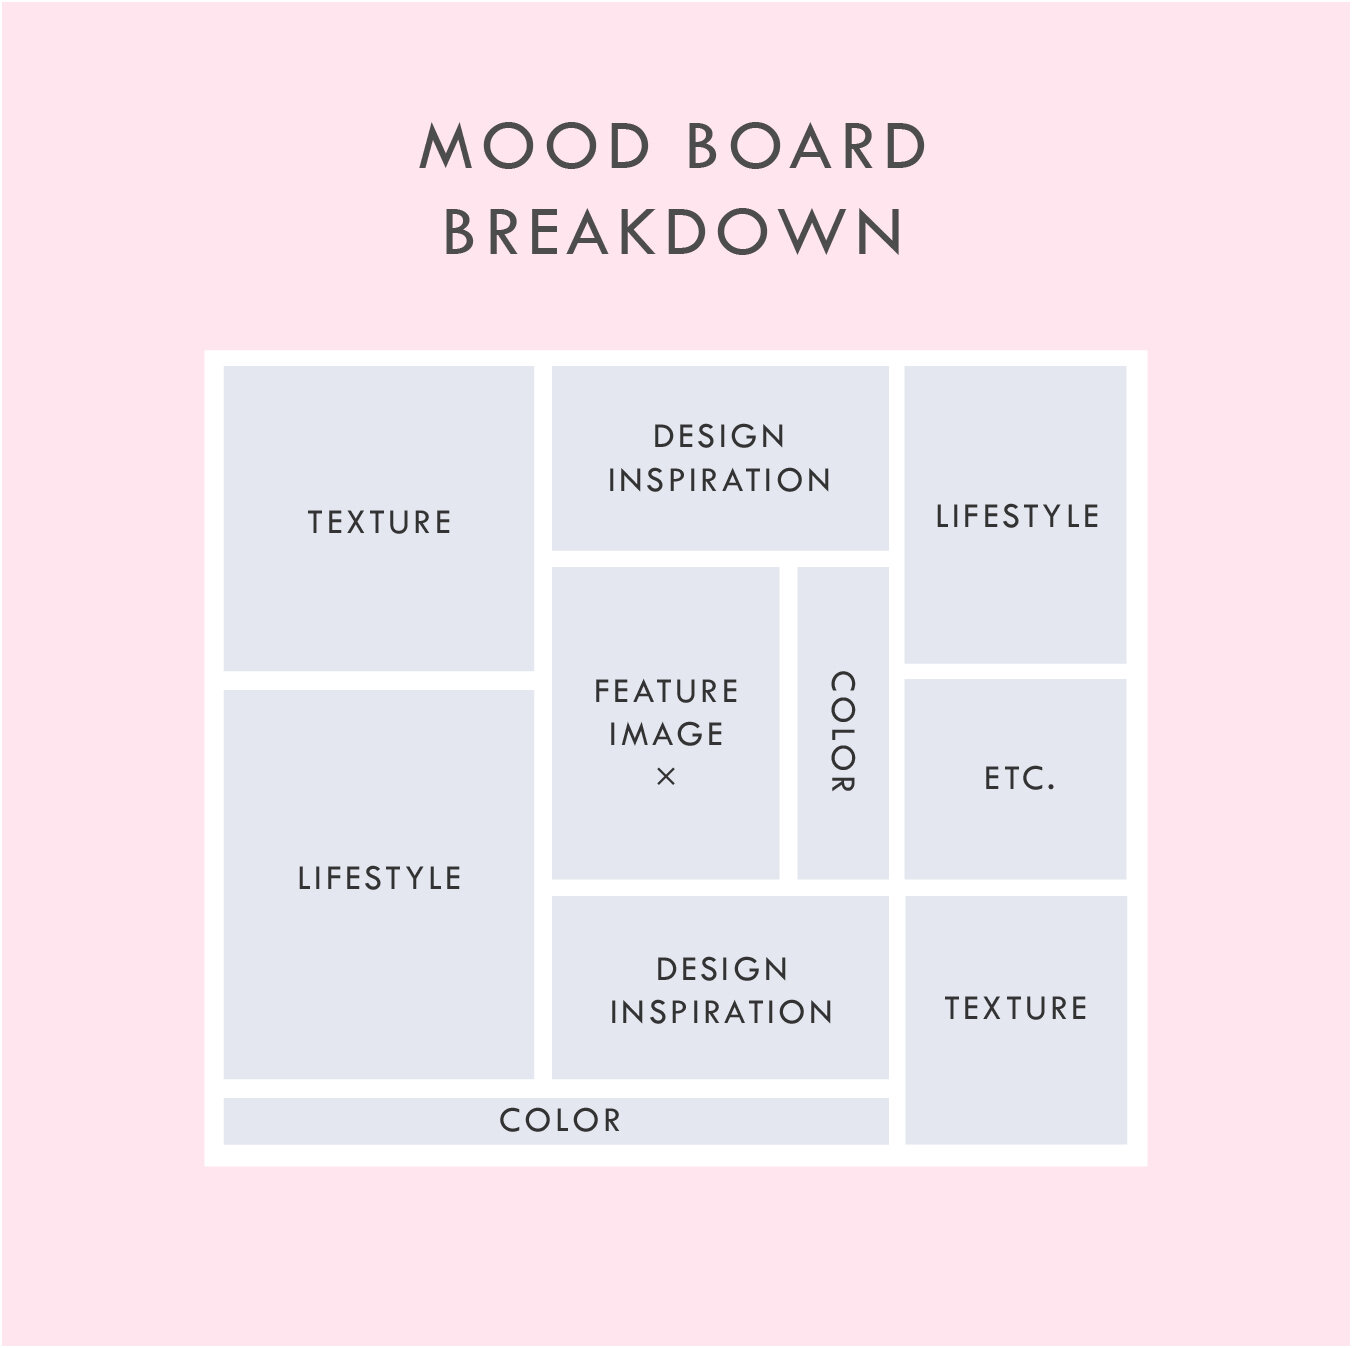
The Canva Mood Board Creator showcasing an organized layout.
Source: Canva
Step 5: Incorporate Text and Descriptions
Adding text to your mood board can enhance understanding of the conceptual focus. Use short descriptions, keywords, or taglines that resonate with your imagery. Texts can clarify ideas and set the tone, helping anyone who views the board understand the core intentions behind the selection of images.
Step 6: Review and Refine
Take a step back and analyze your mood board. Does it accurately reflect the vision you began with? Is there a cohesive theme? Be open to making adjustments, removing items that don’t fit and repositioning others for better visual impact. Getting feedback from friends or colleagues can provide new insights that enhance your board’s effectiveness.
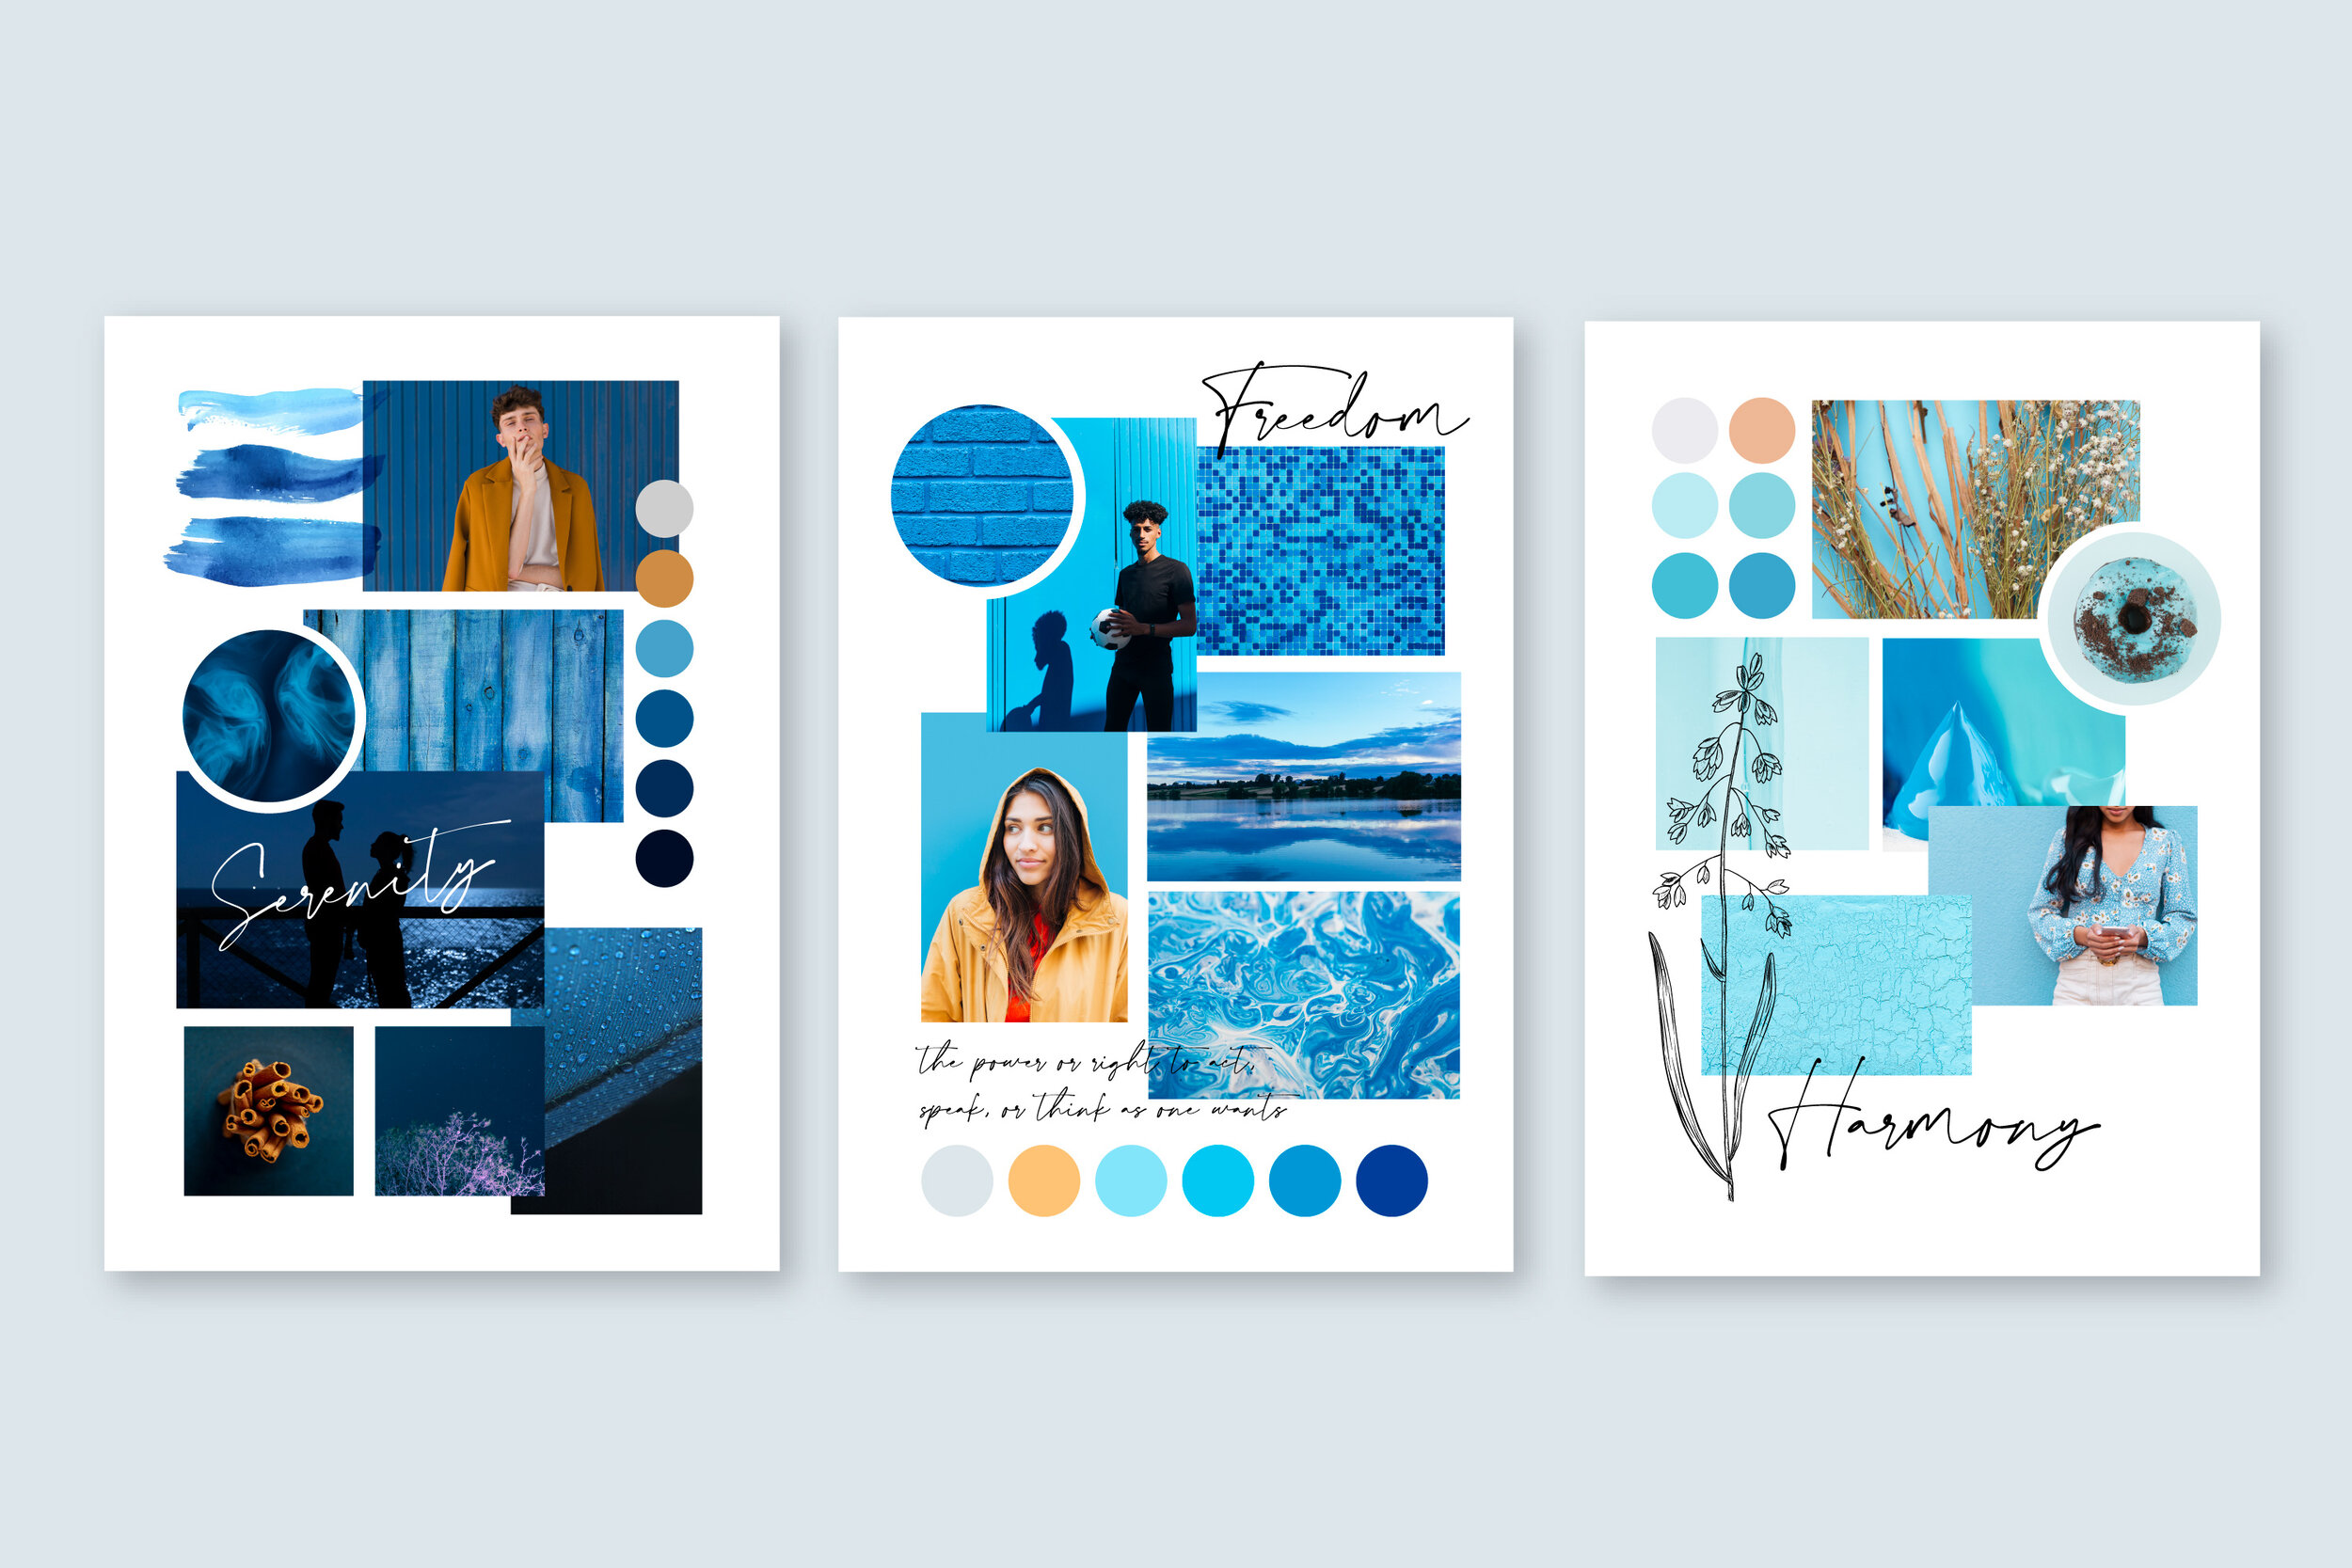
A refined mood board illustrating a harmonious layout.
Source: Katia Galante Art
Step 7: Utilize Your Mood Board
Once you’re satisfied with your mood board, it’s time to use it! Whether for reference during design processes, presentations to clients, or as a creative guide for your work, ensuring it is easily accessible is vital. Digital mood boards can be shared easily across platforms, while physical boards can be displayed in your workspace to continuously inspire your creative journey.
A mood board is more than an arrangement of images; it’s a powerful tool that encapsulates ideas and inspires directions. With these steps, you can create a mood board that not only reflects your vision but also energizes and drives your creative projects forward.
An inspiring mood board that showcases various design elements.
Source: June Mango Design